How to build a circle hoop swing for photo sessions!
Building a flower circle swing is easy! When I built my original hoop swing for a photo shoot in May 2015, I really had no idea it would become such a huge thing! Sadly there still isn’t a lot of information out there on how to build and decorate this, so I wanted to make a definitive how-to for photographers wanting to make a circle swing!
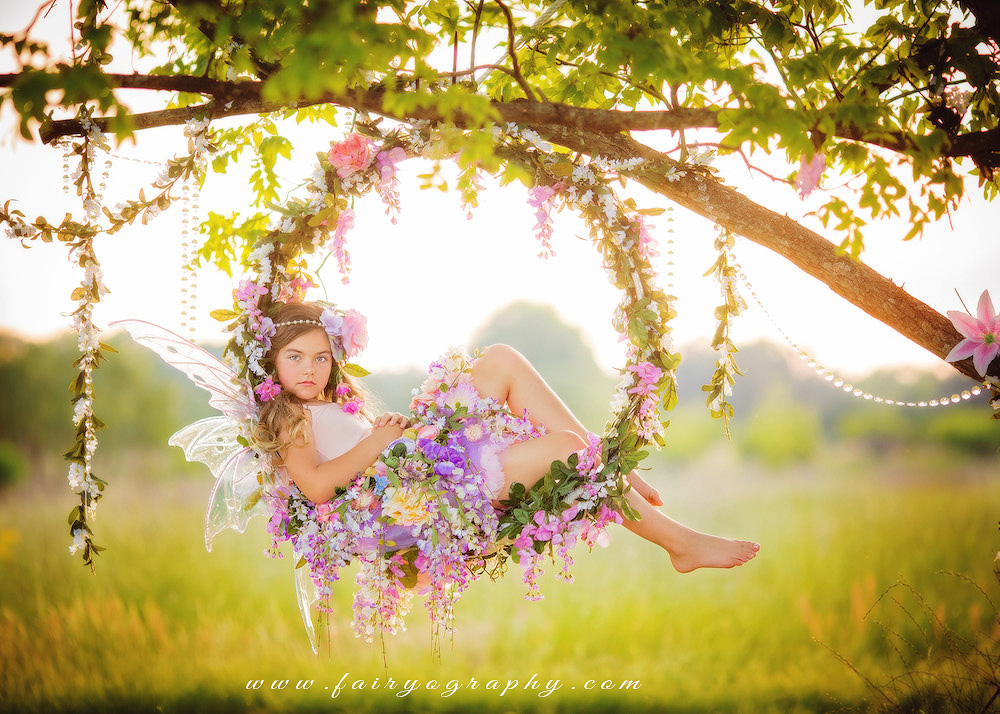
What you need –
You’ll need a few things to start off! A hoop base of some sort, a lot of rope, and a lot of flowers or whatever you’re using to decorate it.
- Hoop base – In my original circle swing, I used two steel hoops my husband found on a farm. They are 36″ and I used zip ties and ropes to make the swing. However, it’s way, way easier to just use a fireplace hoop. I like HollyHOME 40 Inch Large Round Steel Firewood Racks Heavy Duty Holder Log Rack Hoop on Amazon Prime. That’s 40″, which I like for kids up to 14 or so. It has a little bit more room, so you could even get a small adult in there just fine. The ‘foot’ things or stand: my swings aren’t fireplace hoops so I didn’t have those to remove, BUT most people leave them on. I imagine you could take them to a welder to remove them.
- Rope – You’ll need two types of rope for your circle swing, one to make a seat out of and one to use to hang it up. So your seat rope should be narrow but still sturdy. You can pick it up from the hardware store, or just order from Amazon with the fireplace hoop. I used 1/4th inch paracord for the seat. Get two 25ft ones, it’s a lot easier to work with than one 50ft. The hanging rope will have to support the weight of not only the kids you want in it, but also the swing itself. I wanted it to hold up FOR SURE, so I used heavy nylon rated for 5700lbs. You can also get that from Amazon, use the 5/8 inch and get 25ft of it. SGT KNOTS Twisted Nylon Rope 1/4″, 3/8″, 1/2″, 5/8″, 3/4″, 1″, 1.25″, 1.5″, 2″ x Several Lengths (1/4″x25′ – White) I know it’s overdoing it, but I wanted to never end up with hurt kids ever.
- Flowers.. or other things – You want background items and then front items on your circle swing. If you don’t have a background, you’ll se the hoop or if you use all front items like big flowers it’ll look like a hot mess. I’ve used my swing in all seasons, so the base will depend on what you’re doing. If you’re in spring, your background would be greenery and your front would be flowers. If you’re in fall, your background might be autumn leaves while your front would be gold or something else. I’ll show examples below and list each of them. So for the front flowers, you can go to Hobby Lobby or Michael’s or Amazon prime again, but the key here is to not cheap out. This will be what shows in your pictures, and cheap flowers LOOK awful in photos. I know it’s expensive, but it’s critical to use nice ones. Use twist ties to attach the flowers.
- Something to hang it from. That might be a sturdy tree outside or a swingset frame.
How to build –
This section will cover making the circle swing seat and the hanger.
- The seat! So, you have your two types of rope you got on amazon or whatever. The seat rope is the skinny rope. You want to go back and forth front to back up and down to build a comfortable seat to put kids on. Watch the video below to see how I do it.
- The hanger rope! The thicker rope is the hanging rope, which you simply fold in half and run through itself at the top of the swing. Watch the video below to see how I do it. When I’m done hanging it up, I sit in it EVERY TIME myself and bounce a few times. If it holds me, it’ll hold kids just fine.
- Video link to facebook: https://www.facebook.com/Fairyography/videos/1408847219131289/
How to decorate –
This section will have examples for you so you can see what I’ve done with it and what I used to decorate my circle swing. You need to pay attention to how long your garlands are. If you have a 40″ hoop, a 32″ garland will not cover it all even if you just tied it onto the front. I wrap mine around the hoop front and back, which takes more.
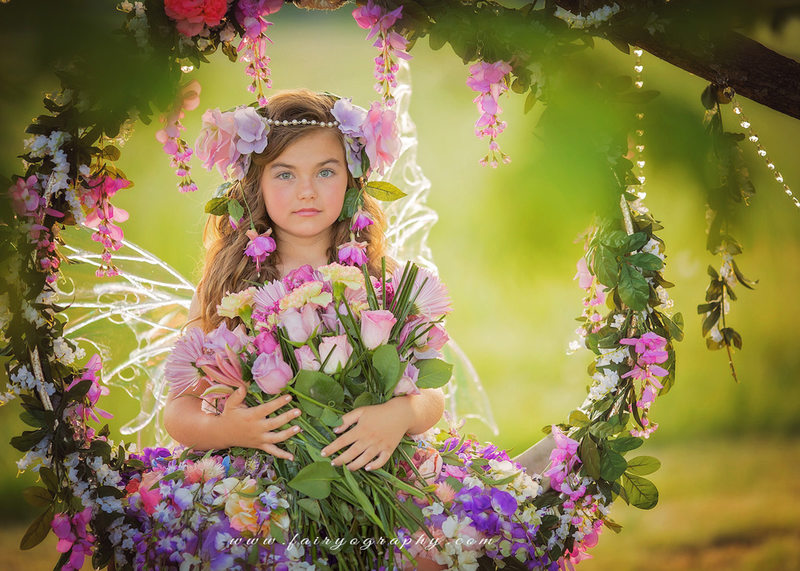
The original circle swing. I spray painted it green and then used six white flower garlands and two wisteria garlands. Then I also hung crystals.
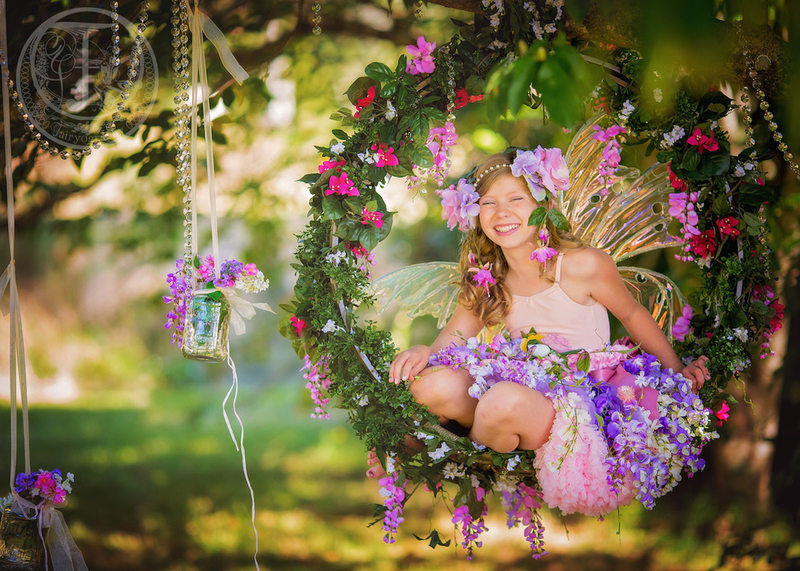
The original with an upgrade. I used the same six white flower garlands and two wisteria garlands, but added two big greenery garlands and two rose garlands. Then I also hung crystals and mason jars full of little flowers.
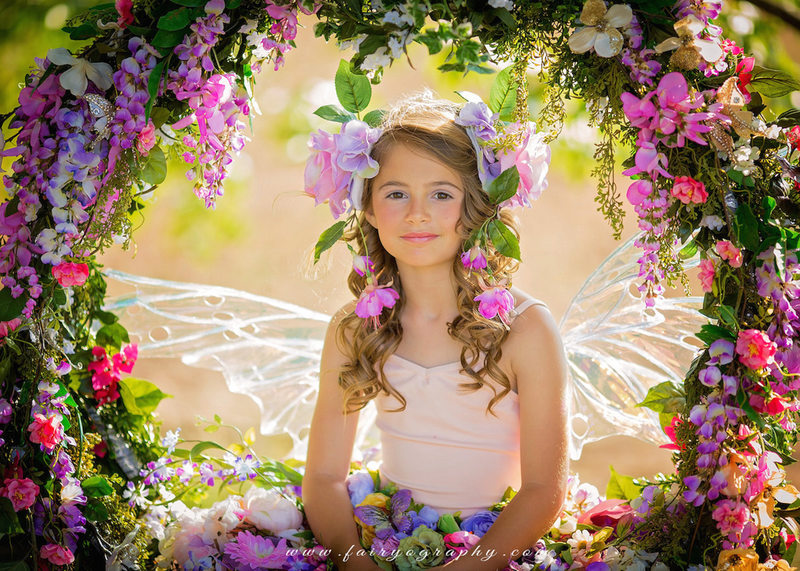
The original with another upgrade. I used the same six white flower garlands and two wisteria garlands, but added two big greenery garlands and two rose garlands. This time I added butterflies and extra fluffier wisteria.
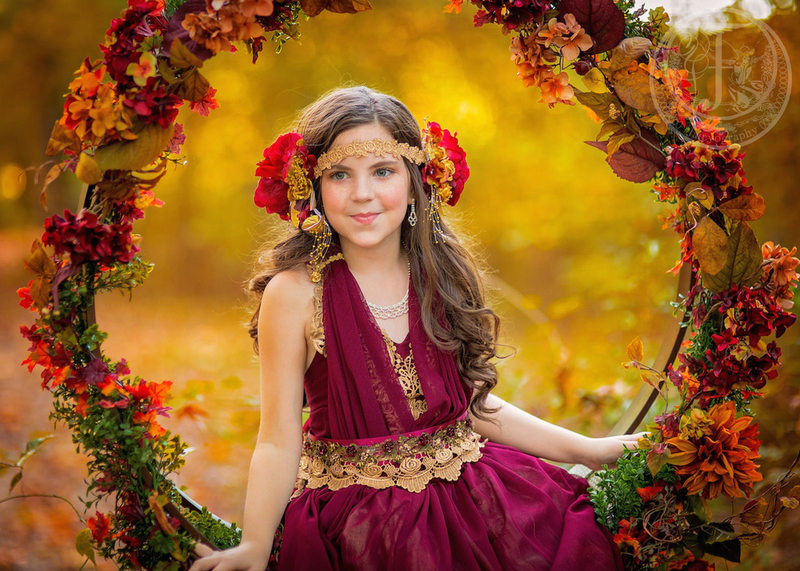
The autumn one. I used the two big greenery garlands from the second original but added two fall leaves garlands and two big flower garlands.
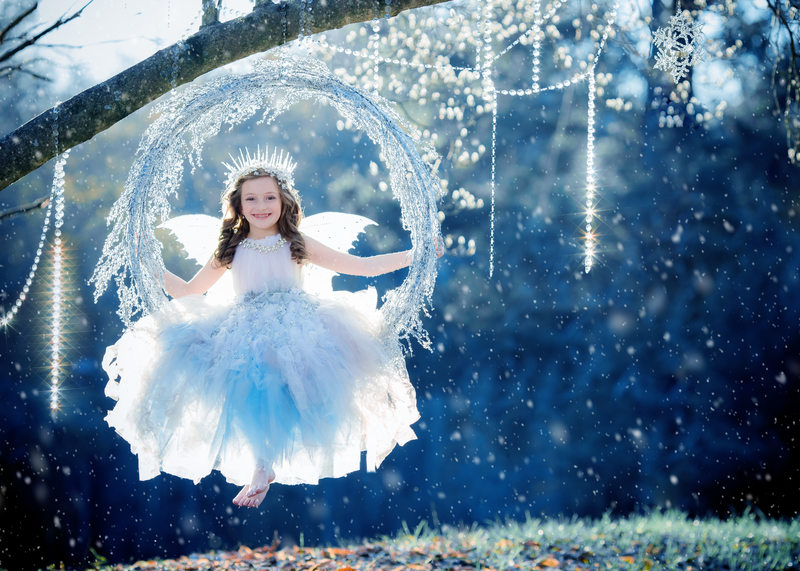
The winter one! I used white ribbon to cover the green swing and then used four ice branch garlands. I found these in hobby lobby in the Christmas section, but the best Amazon has is this: https://amzn.to/3kHEgMT
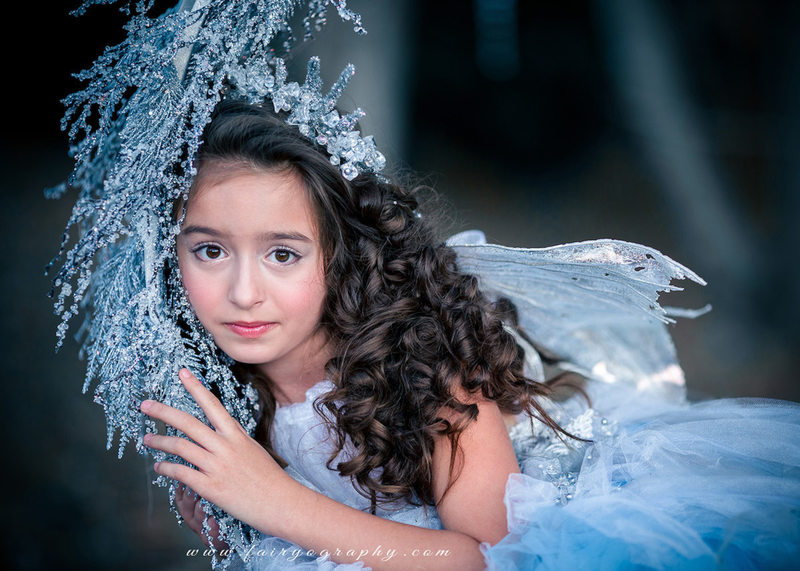
The winter upgrade! I used white ribbon to cover the green swing and then used four ice branch garlands. I also added two feathery ice garlands. I found these in hobby lobby in the Christmas section, but the best Amazon has is this: https://amzn.to/3kHEgMT Then I also hung crystals.
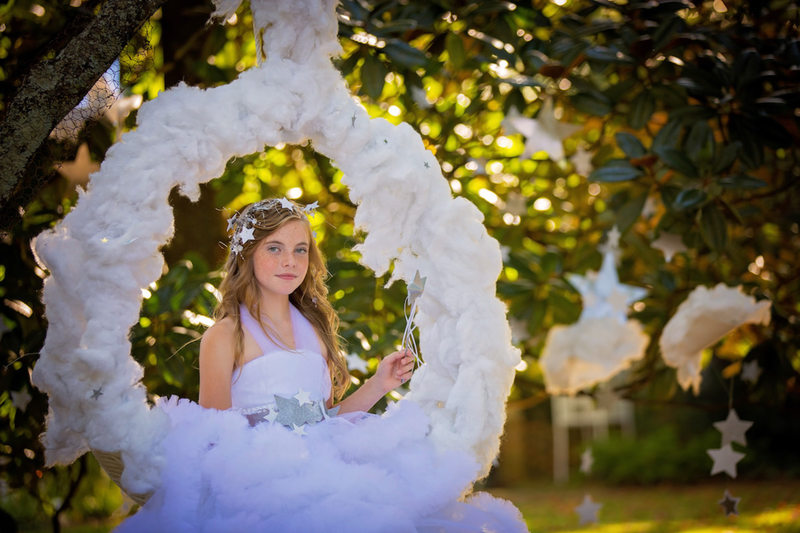
The cloud swing! I used poly-fill batting to cover everything, then used glue dots to stick die-cut stars on it. For the stars, I used my sizzix die cutter machine and the star dies. This ended up looking a little like a diaper, so I think the next time I make a cloud swing I’d actually make cardboard clouds that stick out from the sides.
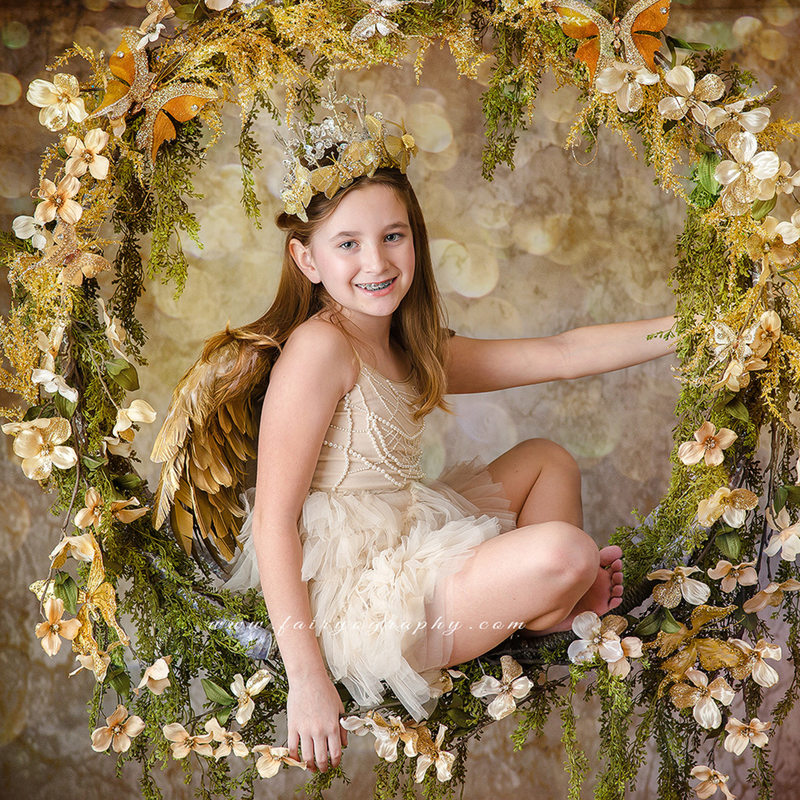
The studio one! This was covered in greenery and two gold garlands and used cut faux dogwood sprayed gold and butterflies.
leave a comment